
The Supra X-Carve CNC Project
The Supra X-Carve Mach 4 CNC Spindle / Laser & MPG Project
We are building this post to share the details and process of creating our own CNC Build. I shared this build with a very good friend, John, and with his help, I created a getter-done attitude and a pretty organized layout for the overall project. I was the student, and he was the teacher on the electronics and a few electrical concerns I was ignorant of, mixed with my old school career in the machining trade, turned out a well-running CNC controller with Mach 4 software of this age.
I am putting this post together in my free time, so stop back from time to time to keep up with the updates. I'll be adding and or exchanging photos and wiring diagrams, then add a few videos covering areas that I feel need more sharing and filling in the text needed to bring it all together. Thank you, Keith
Here is an Updated Block Diagram of Our System, Similar to the Original One John Created to Help Me Get Started in the Right Direction
I was given an assortment of components in trade for some machine work to build or help build my own CNC controller; that's how it all started! LOL, after looking into / researching what I needed to accompany these items, I found some outdated and others no benefit. I decided on Mach 4 software after my Google search from the used Warp 9 USS USB smooth stepper led me to their website: https://warp9td.com/. I also decided the better option was the ESS Ethernet smooth stepper for my liking; I also like the looks of the Leadshine MX4660 to drive the motors and be a breakout board for control, relay, switches, probe, and power needs. With a hunch that I needed more breakout capabilities, I also picked up a newer one rather than using the older unit I had in the collection; both would have worked to run the laser, and I later wanted to add the MPG. In the end, we used the high-speed water-cooled spindle, the VFD, the same X, Y, and Z motors, and axis drive hardware from the original collection of components.

Note: there are a lot of other choices, and we are just sharing the path we took.
After or about the same time I was waiting for my new components to arrive in the mail, John made up the first block diagram as he researched the items I was planning to use.
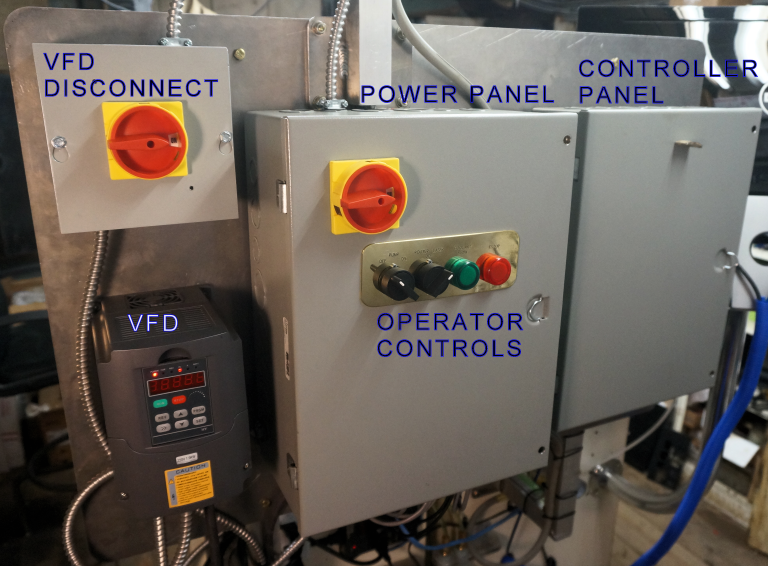
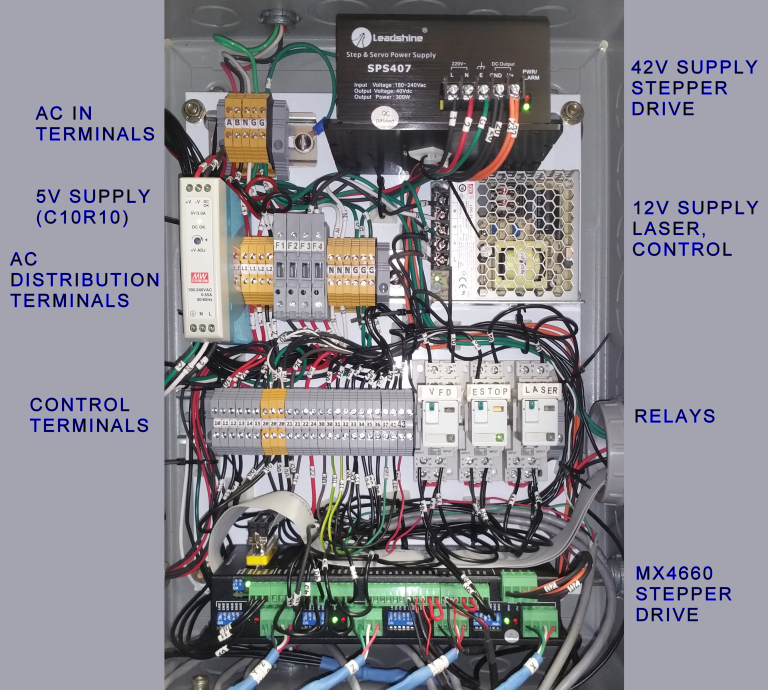
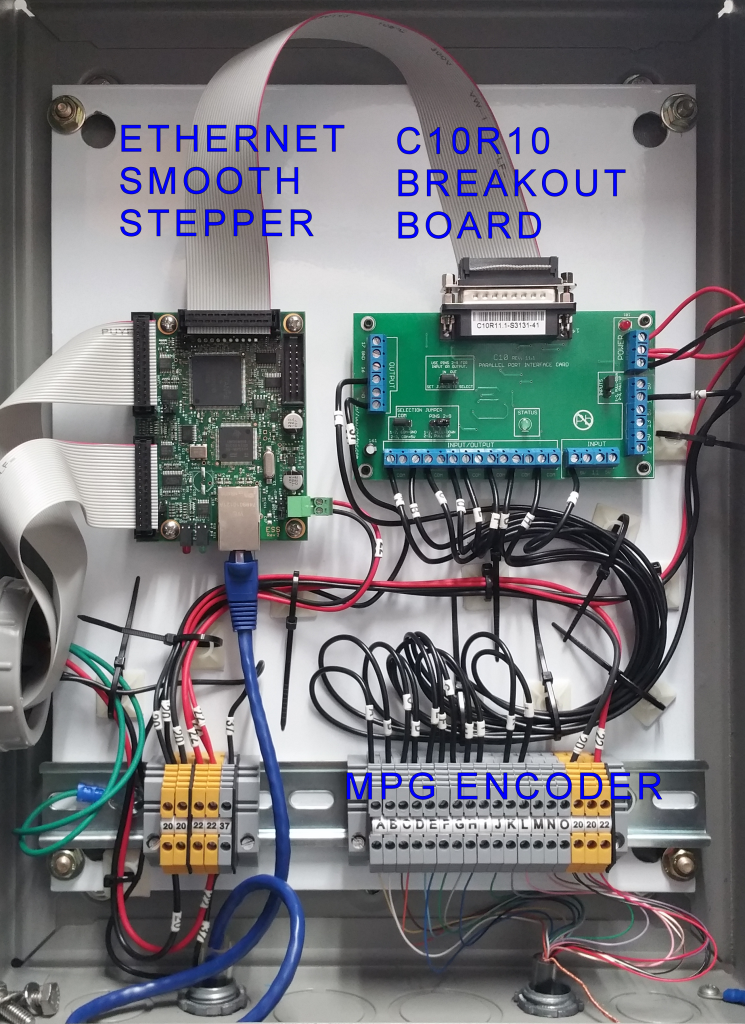
I have enjoyed helping Keith upgrade his X-Carve. The original X-Carve control box was replaced with Mach4 CNC software and an MX4660 stepper driver. An Ethernet SmoothStepper interfaces the Mach4 software running on a PC to the MX4660 and a C10R10 parallel port breakout board.
The spindle motor was replaced with a water-cooled 800-watt KL-800 CNC spindle motor and a VFD (variable frequency drive).
In addition to 4 axes of stepper drive, the MX4660 has 12-volt IO (Inputs and Outputs) for limit switches and general use. The MX4660 also controls the VFD.
The C10R10 board has five 5-volt IO, which was used for LASER PWM (pulse width modulation). Later, an MPG (manual pulse generator) was added to manually position the X, Y, and Z axes.
The documentation for the equipment was often frustratingly incomplete and, in some cases, actually incorrect. Keith and I had to spend time experimenting to verify our guesses as to how it really worked. Our wiring diagrams were created before construction started and updated when changes or corrections were made. This made sure the final drawings represented what we built.
I have seen too many projects where the wiring was done from the equipment's typical application drawings and a few pencil scratches on paper. Later, when repairs or changes are needed, nobody knows what they have.
Turn Wright Machine Works is about 1200 miles from my house, so we communicated by email and phone. Most of the time, Keith actually did the wiring, as I suggested. (Inside joke) There was the occasional misunderstanding. The final result was good, and we both learned a lot along the way.
A Brief Gallery of the Making and a Few Ideas for Adding Personal Touches and Displaying Your Iron Rose
Here Are the Main Up to Date Drawings for This Project


